I've been busy again with another blogger hack. It's another hack facilitated by Yahoo Pipes, which has proved to be a very versatile and useful tool.
Prior Picture Posts?
Inspired by Flickr photo widgets seen around the web, I thought to myself, "Why not make my own?" However, Flickr widgets are a dime a dozen and I've haven't got any Flickr pictures that are worth showing off. After staring at BIcomments for a few minutes, a light bulb glowed above my head and Prior Picture Posts was born.By scanning your blog articles and retrieving only the first image found in each article, Prior Picture Posts entices your readers to check out other posts that you have written. Articles with pictures will feature in the Prior Picture Posts feed, while posts without pictures are skipped.
Nice! How do I get started?
Adding Prior Picture Posts to your blog is a simple affair. Just follow these 3 easy steps and you'll be done in 5 minutes.Note: Your Blogspot posts feed must be in full mode for this to work. To check, navigate to Settings -> Site Feed. Ensure that Blog Posts feed is set to Full.
- Head over to the Prior Picture Posts homepage and configure it. After configuring, run the pipe and copy the feed address. Don't worry if this sounds complicated, it's as simple as taking candy from a baby (not that I've tried).
- Copy your posts feed url. For Blogspot bloggers, it should look like
http://tkhere.blogspot.com/feeds/posts/default?alt=rss
- Got it? Great! Now paste it into the box that says "Enter your Blogger posts feed:".
- Finally enter the number of posts you want shown into the second box.
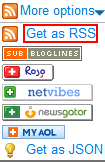
- When you're done configuring your feed, run the pipe and look for more options (under Use this pipe). Click Get as RSS.

- Copy the URL of the RSS feed in your location bar as you'll need it in the next step.
- Copy your posts feed url. For Blogspot bloggers, it should look like
- Add a feed widget to your blog and use the URL from the previous step as the Feed URL.
- Login to Blogger and click the Layout link.

- You should be in Page Elements now. Click Add a Page Element.

- Look for Feed and click Add to Blog. A window should appear asking you for a Feed URL.

- Paste the URL you copied earlier into the Feed URL box in step 3. Click continue.

- Configure the feed options and when you're ready, click Save Changes.
- Login to Blogger and click the Layout link.
- Profit!
Tips
More often than not, your images will be wider than your sidebar. In order to combat this problem, simply add these 2 lines into your css to restrict the images' width.max-width:200px;
width:expression(this.width>200?200:true);
It is obvious what the first line does, but what does the second line do? Well it turns out that Internet Explorer doesn't play well with max-width. A hack around this is to introduce some javascript logic via CSS, which is exactly what the second accomplishes. With the second line, if an image's width is greater than 200 in internet explorer, it'll be set to 200, otherwise it'll be ignored. Browsers other than Internet Explorer will simply ignore this bit of hackery.
Note: When inserting these lines into your CSS, remember to change all three values to the maximum width of your sidebar.

