Google
You could also try tk Social Bookmarking Search or tk Video Search!
Showing posts with label blogger. Show all posts

Wednesday, December 19, 2007

Back to Full Feeds!

Comments

For a few months, I've changed this blog's feed to summary only due to scrappers regurgitating my posts elsewhere. To combat that issue, I decided to add a footer to feed items so that it would be clear to a reader where the article really originated from.

At the time, however, I only looked around for a solution and discovered its summary burner. Other than allowing you to provide a summarized, text-only version of your feed, you can also append a "Teaser" message after each feed item. This wasn't really what I was looking for, but I couldn't find any other Feedburner feature that came close to my original intentions, so I activated it anyway.

Summary Burner

Moron Alert!

While looking through my Blogger settings today, I clicked on Site feed and noticed that Blogger had already provided an option to attach a HTML footer! It has probably been there since the beginning of time, so now I feel like an idiot. :) Great, and now you know what a moron I am. :P

If you've caught the scrapper bug and have no intention of looking stupid in front of your readers, look for Post Feed Footer under Site Feed in your Blogger Settings. From there, you can insert whatever you want, including HTML into that tiny box and it'll automatically appear at the end of each post in your feed.

And yes, I've resumed the full syndication of this blog with a small author acknowledgment at the bottom of each item.


Sunday, December 02, 2007

Blogger Hack: Prior Picture Posts

Comments

I've been busy again with another blogger hack. It's another hack facilitated by , which has .

Prior Picture Posts?

Inspired by photo widgets seen around the web, I thought to myself, "Why not make my own?" However, Flickr widgets are a dime a dozen and I've haven't got any Flickr pictures that are worth showing off. After staring at for a few minutes, a light bulb glowed above my head and was born.

By scanning your blog articles and retrieving only the first image found in each article, Prior Picture Posts entices your readers to check out other posts that you have written. Articles with pictures will feature in the Prior Picture Posts feed, while posts without pictures are skipped.

Nice! How do I get started?

Adding Prior Picture Posts to your blog is a simple affair. Just follow these 3 easy steps and you'll be done in 5 minutes.

Note: Your Blogspot posts feed must be in full mode for this to work. To check, navigate to Settings -> Site Feed. Ensure that Blog Posts feed is set to Full.

  1. Head over to the and configure it. After configuring, run the pipe and copy the feed address. Don't worry if this sounds complicated, it's as simple as taking candy from a baby (not that I've tried).

    1. Copy your posts feed url. For Blogspot bloggers, it should look like
      http://tkhere.blogspot.com/feeds/posts/default?alt=rss

    2. Got it? Great! Now paste it into the box that says "Enter your Blogger posts feed:".

    3. Finally enter the number of posts you want shown into the second box.

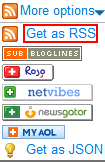
    4. When you're done configuring your feed, run the pipe and look for more options (under Use this pipe). Click Get as RSS.

      Get as RSS

    5. Copy the URL of the RSS feed in your location bar as you'll need it in the next step.


  2. Add a feed widget to your blog and use the URL from the previous step as the Feed URL.

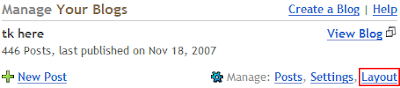
    1. Login to Blogger and click the Layout link.

      Layout

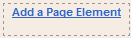
    2. You should be in Page Elements now. Click Add a Page Element.

      Page element

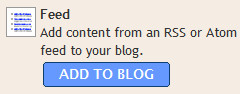
    3. Look for Feed and click Add to Blog. A window should appear asking you for a Feed URL.

      Add feed

    4. Paste the URL you copied earlier into the Feed URL box in step 3. Click continue.

      Feed URL

    5. Configure the feed options and when you're ready, click Save Changes.


  3. Profit!

Tips

More often than not, your images will be wider than your sidebar. In order to combat this problem, simply add these 2 lines into your css to restrict the images' width.
max-width:200px;
width:expression(this.width>200?200:true);

It is obvious what the first line does, but what does the second line do? Well it turns out that Internet Explorer doesn't play well with max-width. A hack around this is to introduce some javascript logic via CSS, which is exactly what the second accomplishes. With the second line, if an image's width is greater than 200 in internet explorer, it'll be set to 200, otherwise it'll be ignored. Browsers other than Internet Explorer will simply ignore this bit of hackery.

Note: When inserting these lines into your CSS, remember to change all three values to the maximum width of your sidebar.

Criticism/Comments?

For a preview, Prior Picture Posts is active only on my individual blog posts. Yours may not look exactly the same as I've enhanced mine with CSS. Any thoughts, comments and constructive criticism you may have are welcome.


Sunday, November 18, 2007

Blogger Hack: BIcomments - Recent Blogger + IntenseDebate Comments

2 comments

Over the past few days, I've been working on a mashup of recent Blogger comments and comments. In case you're unfamiliar with IntenseDebate, it's a neat commenting system that you can install into your blog in a few simple steps. It comes with many features not found in Blogger, like threaded comments/reputation/comments export and import, and supports quite a number of blog platforms.

Unsurprisingly, it comes with a recent comments widget as well. The widget has a clean and neat design that compliments the IntenseDebate comments form. I almost installed it when I discovered there were several drawbacks with the IntenseDebate recent comments widget. The two most significant in my case are the use of javascript and the lack of Blogger comments.

IntenseDebate recent comments widget

IntenseDebate recent comments widget


For most users, the latest comments widget provided by IntenseDebate should suffice. However, I try to avoid using external javascripts whenever I can as I already have many widgets and scripts on this blog. In addition, I'd like to track comments for my other posts as well, which were made before I installed IntenseDebate. (IntenseDebate has an import tool to import older comments, but is currently in beta.)

BIcomments - Recent Blogger + IntenseDebate Comments

Hence I created using Yahoo Pipes. It takes both comment feeds, mixes them up a little and spits out a nice and proper feed so that you can use it in Blogger.

BIcomments

The features:

  • Shows latest comments from both Blogger and IntenseDebate. It can also be configured to display either Blogger or IntenseDebate comments.

  • Number of recent comments can be customized. Note that Blogger displays a maximum of 5 items in a feed.

  • Length of comments can be customized. If a comment exceeds your chosen length, an will be appended to the end of the comment. Note that three dots are actually appended instead of an actual ellipsis. :)

  • Returns a feed. In Blogger, a feed is dynamically included into your blog as HTML, so there's no client side processing.

  • CSS styling. As a feed in Blogger is essentially HTML, you can style your recent comments with CSS.

  • Profanity Filter. A portion of the profanity will be replaced with asterisks.

BIcomments Howto

The design of BIcomments makes it very flexible and user-friendly. New users will like its simplicity, while advanced users will be able to change and mold it to their liking.

Configuring BIcomments
  1. How many characters do you want the comments to be before they cut off? - quite self-explanatory. As I've mentioned, comments exceeding the length that you enter will be cut off and an ellipsis appended to the end of the comment.

  2. How many comments do you want listed? - again, self-explanatory. For Blogspot, 5 is the maximum that you should enter, since Blogspot will display no more than 5 comments.

  3. Enter your Blogger comments feed url - Leave this blank to show only IntenseDebate comments in your feed. Otherwise, stick your Blogger feed URL here.

  4. Enter your Intense Debate feed url - Leave this blank to show only Blogspot comments in your feed. Otherwise, stick your IntenseDebate feed URL here. You can find it in your Dashboard under the last 5 comments section.

Quick start for Blogspot Bloggers
  1. Login to Blogger and click the Layout link.

    Layout

  2. You should be in Page Elements now. Click Add a Page Element.

    Page element

  3. Look for Feed and click Add to Blog. A window should appear asking you for a Feed URL. This is what we'll be getting in the next few steps.

    Add feed

  4. Visit the page and configure it the way you like (as mentioned above in Configuring BIcomments).

  5. When you're done configuring your feed, run the pipe and look for more options (under Use this pipe). Click Get as RSS.

    Get as RSS

  6. Copy the URL of the RSS feed in your location bar and paste it into the Feed URL box in step 3. Click continue.

    Feed URL

  7. Configure the feed options and when you're ready, click Save Changes.

  8. Profit!

The result and some thoughts

For a preview of how it could look like on your blog, just take a look at it in my left sidebar. :) I did some minor transformations and spiced it up with CSS so yours might look quite different. :P

I'm quite satisfied with this mashup as it returns proper author, link, description and pubDate tags. (Thanks to IntenseDebate for adding the author tag upon my request!) The title tag is the only tag that requires an ugly hack, as Blogger returns truncated comments as the title (Grr...). (IntenseDebate returns author + post title.) A quick workaround was to extract it from a page URL. This is also the only reason why this is in beta. :)

Just a day after I wrote this, Yahoo Pipes that allowed me to extract the post title using a (fairly) complicated method I've worked out. Hence BIcomments is out of beta and in its first (and likely to be final) release. :)

If you've got any questions, comments or tips on how to magically insert actual post titles into BIcomments (the method I've come up with is complicated, troublesome and requires a lot of overhead), you're more than welcome to use the IntenseDebate comment form below. :)


Wednesday, November 14, 2007

Everything You Need to Know About FeedBurner Site Ads

Comments

Feedburner and AdSense caught in the same bed!

Last month during Halloween, Feedburner announced that . While not the feature that most wanted (that would be feed ads), it's still a great feature because unlike , Feedburner Site Ads comes with channels and custom palettes. What it still lacks though are multiple palette support and the full set of AdSense ad sizes (currently only 300x250 and 480x60).

How to activate Feedburner Site Ads

Despite these slight disadvantages, I've decided to take the plunge and activate Feedburner Site Ads anyway. :) Along the way, I've recorded my steps so you'll be able to see what you'll be getting yourself into.

  1. Login to Feedburner and head straight for the Monetize tab. Come on, stop staring at your stats. You've got work to do!

    Monetize tab, hear the cash rolling in?

  2. If you're already an AdSense publisher, just sign in to link up your AdSense account to your Feedburner account.

    AdSense sign in, already making big money, eh?


    Otherwise, get yourself an AdSense account.

    Create AdSense account, gimme big money, big money!

  3. Ok, time to login to your email account.

    You have mail!

  4. Check for an email from Google, click the link they tell you to in that email and you'll see a page similar to the one below. Deja vu? You may have done this if you activated inline Blogger AdSense ads.

    Grant access to Feedburner, i need access, bro!

  5. Access granted.

    Access granted, i'm in yr adsenze, showin yr adz

  6. If you're still logged into Feedburner, sign out now and sign back in. Initially, I didn't do this and was wondering if my AdSense channels went to grab a beer (as seen in the screenshot below).

    Head straight to the Monetize tab, check Display Ads, configure your ad options and you're almost done. If you already have FeedFlare embedded into your blog, just hit Activate and ads should appear soon enough. Otherwise, after activating your ads, go back to the Monetize tab and get your HTML code for your blog platform.

    Configure ads, money, money, money...

  7. Profit!

FAQs

  1. Will the ad appear on my site or my feed?
    The ad will appear only on your site NOT your feed. The Feedburner team is working on feed ads for all publishers.

  2. Where will the ad appear?
    The ad will appear below the first item on your site and archive pages once you have installed the necessary code. -

  3. How many ads will there be?
    Our AdSense backfill inventory for the site only places a maximum of a single AdSense unit on the page, be it your home page or a specific article page/permalink. This is the same behaviour as with our own FAN ads. -

  4. Some of my posts have no ads!
    We aren't able to place ads below posts that never appeared in your FeedBurner feed, so those oldest items probably will never show ads. -

Final words

Although I've only recently activated Feedburner Site Ads, its performance so far isn't too shabby. I'm not revealing specific figures though. Let's just say that it can easily outperform other ads on a good day.


Tuesday, November 06, 2007

Does Removing NoFollow for Blogger Backlinks Even Matter?

Comments

Backlinks don't work for me :(

First, to understand how I ventured into this topic, you should know that Blogger backlinks (the section called "Links to this post") won't appear on this blog. I first discovered this issue quite a while back after I changed the blog's template to the present one you see now. :)

The problem doesn't seem to have anything to do with my messing around with the template, as I tried out my template on a test blog and it works there ("Create a link" works). As usual, the answer to most of my problems come from Google.

No answer to no backlinks, but what I found instead...

Needless to say, I didn't find any solution to this issue. :P This is fairly irritating because I would have to 1)debug Blogger's compressed javascript (not a trivial or fun task to do), 2)code my own backlinks (less intimidating than option 1 but why reinvent the wheel?) or 3)forgo backlinks altogether (my current less than ideal choice).

However, my issues aren't the main topic here. :) While googling for an answer to my headache, I came across something else instead - removing nofollow for Blogger backlinks. Quite simply, was invented to tell search engines not to follow a link if a link was tagged as such. It also has further implications such as not contributing to the linked page's (a magical number that many people are obsessed with), among others.

What's the big deal?

You may be wondering why I'm kicking such a big fuss over a couple of bloggers removing nofollow from their backlinks. Actually I wouldn't have cared if what they were doing actually worked.

You see, if you read what I wrote earlier, I mentioned that I would have to debug Blogger's javascript in order to find out why backlinks wouldn't work on this blog. The reason for this should be quite obvious - backlinks in Blogger are implemented using javascript.

And correct me if I'm wrong, but I'm fairly certain that search engines do not even execute javascript. And backlinks only exist if javascript is enabled. Put the both of them together and you'll realize the simple folly behind the idea that removing nofollow from backlinks actually matters in Blogger.

Just in case you need to hear it from an official source, here's a relevant snippet from :
Use a text browser such as Lynx to examine your site, because most search engine spiders see your site much as Lynx would. If fancy features such as JavaScript, cookies, session IDs, frames, DHTML, or Flash keep you from seeing all of your site in a text browser, then search engine spiders may have trouble crawling your site.


Google AdSense implements Easy Ad Management

Comments

New: Manage Ads

Over at , the AdSense team mentions that they're currently rolling out a new feature called "Manage Ads" to all AdSense publishers. True enough, when I checked my AdSense account, Manage Ads was just staring back at me, taunting me to click it.

Manage Ads screenshot
Manage Ads: I dare you to click me!


So what do you need to know?

Here's the super quick lowdown on the new Manage Ads feature, cause you have no time to waste. (Time = money, remember?)
  1. Your old Adsense code still works, but . If your AdSense code is not generated directly from AdSense but through an AdSense partner such as Blogger, then you need to stick to your old code.

  2. To use the Manage Ads feature, you must import your old code to the new format. If you generate AdSense code now and you have the Manage Ads feature, then you'll also be able to use it.

  3. You can change an ad's colors, channels or corner styles, but one characteristic you cannot change is the ad's size. A new Ad unit needs to be created to change an ad's size.

  4. You cannot delete an Ad unit, inactive ad units (no impressions for 7 days) will be hidden. Check "Show inactive AdSense units" to display them.

  5. Your ad code is now shorter than before. It may not be important to you, but I prefer shorter code. :)

Managing my Ads

I tried out the Manage Ads feature and was able to get some of my old AdSense code imported. Importing is as simple as stated by Google. Simply copy and paste the entire chunk of old AdSense code, including the script tags, enter an Adsense unit name, click "Save and Get Code" and you're done.

Note: Actually I tried out 2 of my old Ads and 1 failed to import over. I'm not entirely sure why that is so, but the one that failed was recently generated, so maybe that could be a factor.

In case you're afraid of taking the big leap, here are some screens of importing my old Ad code and an Ad unit I just created.

Manage Ads screenshot
Importing my old Ad code, it begged me to convert!


Manage Ads screenshot
Editing an ad unit, very similar to creating a new one.


Manage Ads screenshot
Managing Ad units


Final words

Google AdSense finally gains a feature that many other online advertisers implemented quite some time ago. Will this be a sign of things to come? One can only hope...


Monday, November 05, 2007

Exploring Picasa Web Albums - Thumbnails and Other Hidden Options

Comments

Keep up with the times, man! Picasa Web Albums is old news!

Recently I've been playing around with . Yes, I'm well aware that it's been more than a year since it made its debut and about 8 months since its integration with Blogger.

On the fly thumbnailing, baby!

64 Pixels One of the interesting features of Picasa Web Albums is that a photo only needs to be uploaded once and you can retrieve back in several different fixed sizes. I like this feature because
  1. it reduces overhead if you don't need a big picture,

  2. you don't need to create thumbnails if you are embedding a large picture

  3. and it reminds of the write once, use many rule of programming.

Since it's been out for over a year, what are the available thumbnail sizes?

However, while I knew Picasa resizes images automagically, what I didn't know were the fixed sizes that I could actually use as thumbnails. Uploading pictures via Blogger (they're integrated with Picasa) gave me some clues with its ability to specify 3 different sizes, but I wasn't totally satisfied. By randomly testing out multiples of the original 3 values I had, I managed to uncover more valid sizes that could be used and I decided to stop there for a while.

All known Picasa thumbnail values revealed...

After that brief pause, I tried Googling and searching for this particular topic but didn't come up with an official list. I did find several unofficial lists, but I knew they were missing some values because of my previous discoveries. Almost by chance, I stopped by to take a look around. And there it was - the official list of Picasa thumbnail sizes tucked away in .

Size Cropped Embeddable Size Cropped Embeddable
32 Yes Yes 576 No Yes
48 Yes Yes 640 No Yes
64 Yes Yes 720 No Yes
72 No Yes 800 No Yes
144 No Yes 912 No No
160 Yes Yes 1024 No No
200 No Yes 1152 No No
288 No Yes 1280 No No
320 No Yes 1440 No No
400 No Yes 1600 No No
512 No Yes d No No


For some info about cropping skip to the end of this article. And don't worry too much about some of the embeddable values being listed as "No". I believe ALL of the listed sizes (except d) are actually embeddable (you can stick them on a webpage).

Note: The very last value, d, cannot be used. Well, that's my current theory since I haven't found out how to use it. :)

How do you use them?

With this list at my disposal, everything became much simpler and clearer. No more mucking around, trying to second guess if I can use a certain value. Of course, now that you've found this list, it's still useless to you unless you know how to actually make use of it. :) So here's a quick and dirty guide to help you out just cause I'm such a nice person. :P

  1. First, find the Picasa URL of the image you want to resize.
    1. In Picasa, click on the photo and look for the Download Photo link. Copy that download link.

    2. If you uploaded via Blogger however, it'll be something similar to
      http://bp1.blogger.com/_yF4ImO9N_uE/Ry7u3e5sK4I/
      AAAAAAAAAxc/KMDZl9-SydM/s1600-h/2000pixels.gif

      It doesn't really matter what the URL is, whether it's Picasa or Blogger, as long as you have a direct link to your image in the format above.


  2. Next, change the red part to some other number on the list above.
    http://bp1.blogger.com/_yF4ImO9N_uE/Ry7u3e5sK4I/
    AAAAAAAAAxc/KMDZl9-SydM/s32/2000pixels.gif

  3. Watch as a smaller version of your image is downloaded from Google's servers. You can verify this by right-clicking on the image and viewing the properties.

  4. Profit!

Examples/Proof that it works...

32 Pixels 48 Pixels 64 Pixels 72 Pixels 144 Pixels 160 Pixels

Other interesting stuff I found

The maximum image size that you can upload to Blogger is 1600x1600 pixels. Sure you can upload gigantic images taken with your expensive 100 megapixels camera but in Picasa it'll end up as a 1600x1600 image. I tried this only once with the picture you see in this post (which as it says was originally at 2000x2000 pixels) and it ended up being resized to 1600x1600pixels, so don't say I didn't warn you. :) However, when I uploaded directly via the Picasa Web Albums web client, I didn't face this limitation.

I came across some query parameters that can be used in association with your Picasa image URL. These are


Final words

I hope putting this bit of info out in the open was helpful because I spent my precious time writing it. :P If any geniuses out there come up with some useful Picasa tips, feel free to share them here.

And just in case you're wondering, (2 Radiohead "official" covers in different sizes).


Tuesday, October 30, 2007

Howto: Blogger Sitemaps Errors/Warnings Fix & Entire Blogspot Sitemap Submission

16 comments

What/Where are these errors you speak of?

Blogger/Blogspot users that use are well aware (maybe not) that if they submit their feed normally, they will run into the dreaded Errors/Warnings that no one likes to see. By a normal submission, I mean something like
http://tkhere.blogspot.com/rss.xml
OR http://tkhere.blogspot.com/atom.xml

(Little known fact: It is possible to submit feeds like
http://tkhere.blogspot.com/feeds/posts/default
OR http://tkhere.blogspot.com/feeds/posts/summary

as well. Simply add
http://tkhere.blogspot.com/feeds/posts/

as a site. Re-verification of your blog is not necessary.)

It gets worse...

If you turned on and click tracking in Feedburner, you'll get a lot more errors. This is because Google doesn't allow foreign URLs in your sitemap. And click tracking in Feedburner changes your feed links to the Feedburner domain in order to track clicks. Bumper.

The simple fix

My method:

Note that this method is not supported officially and should NOT be used. :)
Simply add ?orderby=updated to the end of your feed URL. This simply sorts your posts by their updated date and not published date. So it should turn out something like this:
http://tkhere.blogspot.com/atom.xml?orderby=updated (recommended)
OR http://tkhere.blogspot.com/rss.xml?orderby=updated (recommended)
OR http://tkhere.blogspot.com/feeds/posts/default?orderby=updated
OR http://tkhere.blogspot.com/feeds/posts/summary?orderby=updated (not recommended)

Another method: Simply add ?redirect=false to the end of your feed URL. This tells Blogger/Blogspot not to redirect your feed to Feedburner. So it should turn out something like this:
http://tkhere.blogspot.com/atom.xml?redirect=false (recommended)
OR http://tkhere.blogspot.com/rss.xml?redirect=false (recommended)
OR http://tkhere.blogspot.com/feeds/posts/default?redirect=false
OR http://tkhere.blogspot.com/feeds/posts/summary?redirect=false (not recommended)

This method comes from via .

But that's not all...

has gone further on to explain how to submit your entire Blogger sitemap to Google Sitemaps. Here I add some pretty pictures to make it easy to follow.

The proper way to submit your entire Blogger Sitemap to Google Sitemaps!

Note: I used
http://tkhere.blogspot.com/

in the following steps, replace it with your own site URL. Some URLs can't fit into a single line so I've split them into 2 lines. When you enter them, they should be in a single line with no spaces.


  1. Figure out how many posts you have made so far.

    • Login to . You should be at now.

    • Click on Posts.

      Looking for posts?

    • Look for
      Your Posts: All, Drafts, Published

      When you found it, click on Published.

      Number of posts

    • Next to Published, you should see something like
      1 – 10 of 386

      which shows you the number of your published posts so far.


  2. Now login to and submit
    http://tkhere.blogspot.com/atom.xml?redirect=false&max-results=100
    &start-index=1

    as a sitemap.

    Note: If you haven't already, you would need to add your site
    http://tkhere.blogspot.com/

    into Google Sitemaps before you do this step.


  3. The observant among you would have noticed the red 1 in the previous step. If you have more than 100 posts, you would need to repeat step 2 as many times as needed to submit your entire sitemap, adding 100 to your previous start-index each time.

    • Example: If you have 150 posts, submit
      http://tkhere.blogspot.com/atom.xml?redirect=false&max-results=100
      &start-index=1
      http://tkhere.blogspot.com/atom.xml?redirect=false&max-results=100
      &start-index=101

      as sitemaps. This means you would need to add 2 sitemaps for your site.

    • Example: If you have 250 posts, submit
      http://tkhere.blogspot.com/atom.xml?redirect=false&max-results=100
      &start-index=1
      http://tkhere.blogspot.com/atom.xml?redirect=false&max-results=100
      &start-index=101
      http://tkhere.blogspot.com/atom.xml?redirect=false&max-results=100
      &start-index=201

      as sitemaps. This means you would need to add 3 sitemaps for your site.

    Technical explanation in layman's terms: The query parameter
    max-results

    tells Blogger how many posts you want returned. There is a limit to the number of posts that Blogger will return, currently 500 (as Kirk states), but to be on the safe side, stick to 100.

    The query parameter
    start-index

    tells Blogger which post number to start returning results from.


Holy crap Batman! How did you guys figure this out?

The query parameters shown here are not hidden in the darkest corners of Google. :) Google has a list of valid query parameters for Blogger at . Have fun! ;)

The only exception I'd like to note is that the redirect parameter is not listed here. It originally (as far as I can tell) comes from . Another more informative post was made again at the , this time including WordPress users of the Feedsmith plugin. I don't use WordPress, but isn't there a Google Sitemaps plugin for WordPress or something?

Final words

Anyway, this should clear up everything... till something breaks. Again. :)


Friday, August 24, 2007

Blogspot adds video uploads

Comments

If you have a blog hosted at Blogspot, did you notice this icon Blogspot video upload in the shortcut bar? No idea what I'm talking about? Or are you just not observant enough?

Try logging in to your Blogspot account and composing a new post. And hey presto (wow!), a new upload video icon appears beside the upload picture icon Blogspot picture upload in the toolbar. If I'm not wrong (I hope I'm not!), I'm pretty sure I have not seen this icon in the toolbar before.

When you click this icon Blogspot video upload, the whole screen blanks out and a new screen is presented on top of the original screen, aka the Lightbox effect (there are other versions of this known as Thickbox, Greybox, etc). This is quite different from picture upload, where a new popup appears. I guess Google got lazy and decided to forgo standardization.

In the new screen, it states that "We accept AVI, MPEG, QuickTime, Real, and Windows Media, 100 MB maximum size", which is the same as YouTube. However it does not list the 10min limitation that YouTube has as well.

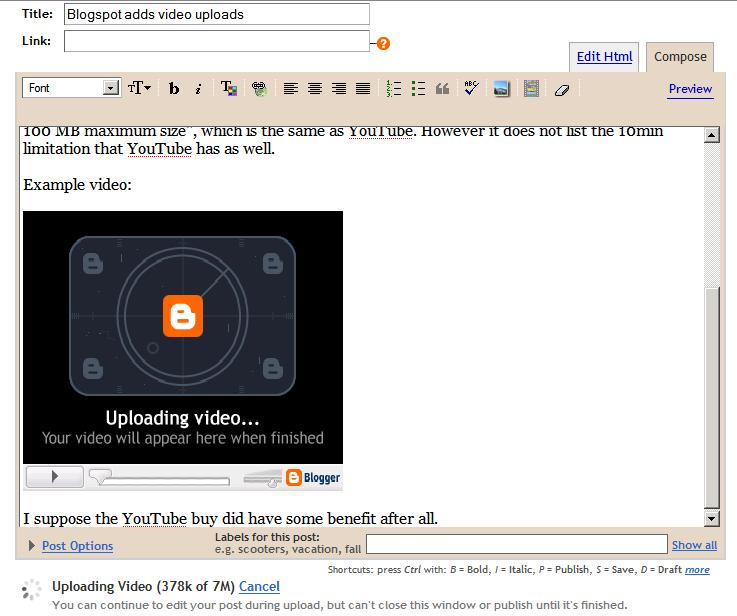
Uploading screen:
Blogspot uploading video screenshot

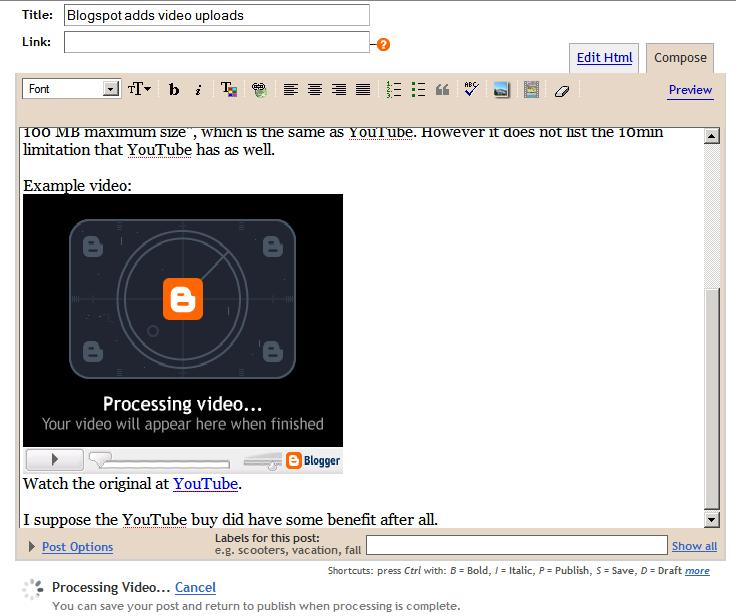
Processing screen:
Blogspot processing video screenshot

Example video:


Watch the original video at YouTube.

I suppose the YouTube buy did have some benefit after all.

Update: Blogger Buzz has a post about this new addition to Blogspot.


Sunday, February 05, 2006

Howto: AJAX for Blogger peek-a-boo content

23 comments

Introduction: As part of my recent design changes earlier, I added AJAX functionality to this blog. More on this here. This is a howto on replicating this on your own blog @ Blogger. I'm assuming you have some knowledge of html, blogger template code and javascript. You may want to read up on AHAH here. I've split up the code into 3 parts.

Ok, I'm starting off with the last part of my code first, since it is easier to explain how everything works that way. First look at the template code below. Hopefully you understand what's happening here because it's basic html and blogger template codes.


<MainOrArchivePage>

<small onclick="javascript:toggler('<$BlogItemPermalinkUrl$>', this, '<$BlogItemNumber$>post')" style="cursor:hand;">Click to view</small>

</MainOrArchivePage>

<div class="post-body" <MainOrArchivePage>id="<$BlogItemNumber$>post" style="display:none;"</MainOrArchivePage>>

<ItemPage><$BlogItemBody$></ItemPage></div>


So everything starts when a user clicks on "Click to view". As you can see it calls the toggler function and from there, somehow the div class="post-body", which is the entire post appears. (The way it works for comments and backlinks are similar so I don't think an explanation is required.)

The below you see is the last part of my code, which is the toggler function. Notice that it accepts 3 variables - serverPage, linkobj and objID. Where do these variables come from? Look at "Click to view" again. Do you see '<$BlogItemPermalinkUrl$>', this, '<$BlogItemNumber$>post'? Yup those 3 are the 3 variables. The first variable, serverPage, contains '<$BlogItemPermalinkUrl$>', the post permalink url, also where you are gonna parse content from. The 2nd variable, linkobj, holds the link object itself. This is so that you can change "Click to view" to "Click to hide". The 3rd variable, objID, contains the post id, so that the script knows which post to show or hide.

Now you know how what these variables are. Let me briefly explain what the code is doing. First, it gets the element that is stored in objID and stores it in obj for later use. If objID (the post) is already shown, hide it. Then depending on whether objID contains post, blinks(backlinks) or comments, different actions will be taken. For comments, if there is no comment, the comment page will popup instead of trying to display 0 comments.

The next part does exactly the opposite. If objID is hidden, show it. The important part here is ahah(serverPage, obj, objID); that you see appearing 3 times, each for post, comments and blinks(backlinks). That is the AJAX function that requests the page from the server, which you will see later. It sends the 3 variables for processing.


function toggler(serverPage, linkobj, objID) {
var obj = getElement(objID);
if (isShown(objID)) {
obj.style.display = "none";
obj.innerHTML = "";
if (objID.indexOf("post") != -1) { linkobj.innerHTML = "Click to view"; }
else if (objID.indexOf("blinks") != -1) { linkobj.innerHTML = "Show Backlinks"; }
else if (objID.indexOf("comments") != -1) {
if (linkobj.innerHTML == "0 comments") {
window.open("http://www.blogger.com/comment.g?blogID=19630625&postID=" + objID.substring(0, objID.indexOf("comments")));
}
}
}
else {
if (objID.indexOf("post") != -1) {
obj.style.display = "block";
linkobj.innerHTML = "Click to hide";
ahah(serverPage, obj, objID);
}
else if (objID.indexOf("blinks") != -1) {
obj.style.display = "block";
linkobj.innerHTML = "Hide Backlinks";
ahah(serverPage, obj, objID);
}
else if (objID.indexOf("comments") != -1) {
if (linkobj.innerHTML == "0 comments") {
window.open("http://www.blogger.com/comment.g?blogID=19630625&postID=" + objID.substring(0, objID.indexOf("comments")));
}
else {
obj.style.display = "block";
ahah(serverPage, obj, objID);
}
}
}
}

function getElement(id) { return document.getElementById(id); }

function isShown(id) { return getElement(id).style.display != "none"; }

//-->
</script>
</MainOrArchivePage>


The code you see below is the main part of AJAX, which happens to be the first part of my code. It is where the magic gets done. Basically, when a user does something, the browser will request for some info from the server and update only the necessary elements. You'll see that it accepts 3 variables and these 3 variables came from the part above. What can be safely changed here is obj.innerHTML = 'Hang on...';. This is just a message telling the user to wait for changes. Next, notice this part ahahDone(obj, objID);. It sends 2 variables to the ahahDone function for processing.

The ahahDone function is just checking to see if everything is ok. If it is, well we're happy and it can send a variable to either getPost, getComments or getBlinks function, depending on what objID contains. These functions strip out the parts we want and throw the rest away. What you can change here is { obj.innerHTML="Status:\n" + xmlhttp.statusText; }. This is sort of like an error message informing the user when AJAX fails (here I left it as the status message returned instead).

<MainOrArchivePage>
<script type="text/javascript">
<!--
function ahah(serverPage, obj, objID) {
obj.innerHTML = 'Hang on...';
if (window.XMLHttpRequest) { xmlhttp = new XMLHttpRequest(); }
else if (window.ActiveXObject) { xmlhttp = new ActiveXObject("Microsoft.XMLHTTP"); }
if (xmlhttp) {
xmlhttp.onreadystatechange = function() { ahahDone(obj, objID); };
xmlhttp.open("GET", serverPage, true);
if (window.XMLHttpRequest) { xmlhttp.send(null); }
else if (window.ActiveXObject) { xmlhttp.send(); }
}
}

function ahahDone(obj, objID) {
if (xmlhttp.readyState == 4) {
if (xmlhttp.status == 200 req.status == 304) {
if (objID.indexOf("post") != -1) { getPost(obj); }
else if (objID.indexOf("blinks") != -1) { getBlinks(obj); }
else if (objID.indexOf("comments") != -1) { getComments(obj); }
}
else { obj.innerHTML="Status:\n" + xmlhttp.statusText; }
}
}


The code below is the 2nd part of my code. It appears last as it is the easiest to explain. Each function accepts a variable sent from ahahDone. This variable happens to contain a reference to the element where you want the content to appear. Next, resText = xmlhttp.responseText;, where resText contains the entire page retrieved from the server. Obviously, you only want to insert certain parts of the page inside, so you'll need to search for the things you want. The rest of the lines just do some careful searching (all those indexOf lines) and the very last line of each function does a substring to cut out the relevant parts out and stick it into the html of the post element (obj).


function getPost(obj) {
resText = xmlhttp.responseText;
start = resText.indexOf("<!-- Begin .post -->");
start1 = resText.indexOf('<h3 class="post-title">', start);
start2 = resText.indexOf('</h3>', start1) + 5;
end = resText.indexOf('<p class="post-footer">', start2);
obj.innerHTML = resText.substring(start2, end);
}

function getBlinks(obj) {
resText = xmlhttp.responseText;
start = resText.indexOf("<!-- Begin #comments -->");
start1 = resText.indexOf('<a name="links">', start);
end = resText.indexOf('<p class="comment-timestamp">', start1);
obj.innerHTML = resText.substring(start1, end);
}

function getComments(obj) {
resText = xmlhttp.responseText;
start = resText.indexOf("<!-- Begin #comments -->");
end = resText.indexOf('<a name="links">', start);
obj.innerHTML = resText.substring(start, end);
}


And that sums it up. With some luck, you should be able to do the same. Comments on this are welcome.

Edit: I added a line of code in the toggler function to fix a bug. That line is (obj.innerHTML = "";).

 
Google
You could also try tk Social Bookmarking Search or tk Video Search!